Creating a Magic Box (new local class, too!)

Starting this month, I’ll be running a monthly mixed-media class. I’ll be teaching projects and techniques at a lovely little studio space near downtown Phoenix, and we’ll have a yummy dinner & dessert to enjoy while we’re creating! 

I am so very excited to show you November’s project — a magic box! 

I wanted us to create things that could be given as gifts or help us record the upcoming holiday season for the next two months, and became enchanted by the magic of nature and wishes and boxes combined! 

The process of creating this box was brilliant! I know we talk about the transformative power of creating art, but it is one thing to read the words and another to experience them

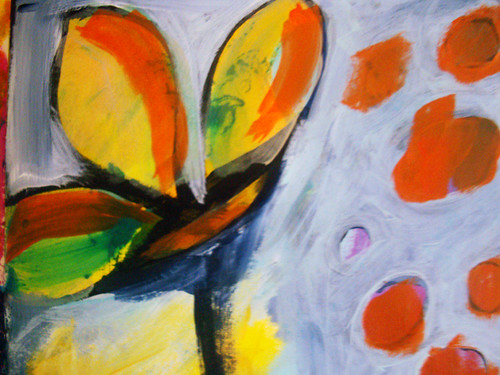
My new awakening has me out in nature, more, reconnecting to my roots. I want to stand in the grass and soak in the energy of the Mother. I want to jump in pile of leaves (in dreams, as there are not enough leaves here to create a pile). I want to pull nature into my daily life and art, and I learned that through creating this piece. 

I also began working with clay. As a child, my mother was an amazing clay artist, using found objects and her own hands to craft faces and shapes and little creatures. Textures for skirts and faerie wings. I’ve missed that, and became inspired to add clay to my box. 

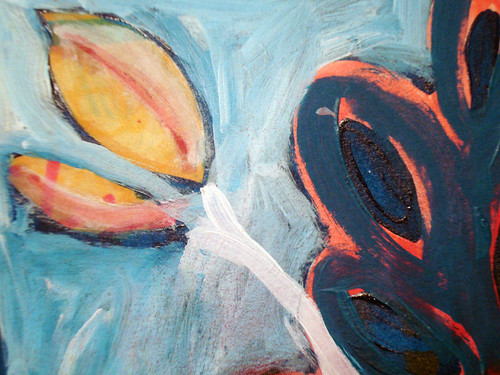
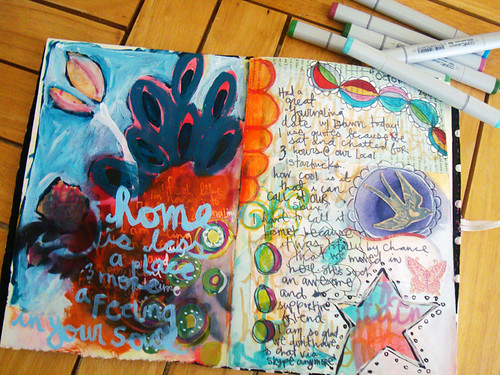
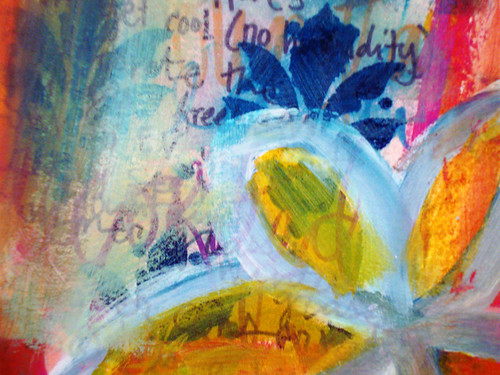
And then there is a bit of collage. Washi tape. Paint. Crayons and marks and scallops. Stamps. 

But my love is the bundle of twigs, held together with wire and findings, old seam binding from my grandmother’s stash. The wire loops down through the lid of the box to create a handle with which to open your box of magic. Of photos. Of books. Of memories. Of wishes for the future, dreams you hope to come true. 

There are so many possibilities. 

I am so excited, I’m going to create more! More and more! 

You can come with and make one, too! 

I’ll be teaching the first class of my new monthly shindig on Tuesday, November 20, 2012, at 6PM

It will be held at Spread the Weird Studio down near 7th Street & Roosevelt, right along Roosevelt Row and all those galleries and shops! 

Cost is $30. Part of the cost goes towards yummy food. 
Please bring your own cigar box (or you will be able to grab one at class for a small fee).

This class is organized by me and Denise of the Make Stuff Club meetup. You can either pay via PayPal with the link below, or call me to pay over the phone. Please note that space is limited!

I really hope to see you there! I want this monthly meetup to be full of art, fun, and new discoveries. 

[mini-tutorial] Thin Line Squeeze Bottles

I was wandering through Hobby Lobby, as I do, and found these little bottles with needle tips. Now, I’ve used these little bottles in my artwork before and made quite a mess, and wondered how the experience would be changed if the tips were really, really little.

It is awesome

I mixed some fluid acrylic with water in one, put on the needle tip, and started playing around. You can draw remarkably well with these bottles, and I found myself doodling and then experimenting with writing. 

 However, be careful! Once the acrylic is gone and there’s only muddy water left, you won’t get those precise lines anymore. So play around with your watercolors and acrylics in these bottles to find the right viscosity to make some really cool marks.  

The great thing is, since you’re writing in acrylics, you can work over them or color the shapes in without having to worry if the ink is going to spread. And since you can hold the bottle much more firmly, and have a solid tip, you can write and doodle with it much easier than if you were to attempt the same thing with a brush. 


{finding my doodler spirit}


I’ve never considered myself a good doodler. Honest. I just don’t feel that I have a large enough internal doodling encyclopedia to create anything varied enough to not be boring

A couple months ago, one of the women at the mixed-media group I attend told me about this new pen she’d purchased off someone’s recommendation (and I’m sorry; I don’t remember the teacher’s name!) and how she loved it. “It wasn’t expensive at all!” 

When I started college, I got my first fountain pen. Nothing fancy or expensive, just a lime-green one I would write with. It feels cool to write with a fountain pen — if you’ve never tried it, you’re missing out! There is just something almost magical about writing with a fountain pen, the way the ink swishes from the nib, a smooth, continuous stream that isn’t dry like a ballpoint or even slick like a gel pen. But smooth. Flowing. It almost lends itself to transforming even your grocery list into a piece of art. 

But I lost that pen. And forgot the magic. It was replaced a few years later, and I carried it in my purse when I moved out to Los Angeles for a bit. It was snuggled in the little purse next to my very first visual journal, where paintings about airplanes and oceans were sandwiched between notes and plot ideas for scripts. I remember asking a writer for an autograph and having to say, “It’s a fountain pen!” when he tried to sign the program (Oh, Eric Kripke, I’m sorry for throwing that curve ball!). 

That, too, was lost. 

I never thought of applying a fountain pen to art until that meeting, in July, when I was reminded of the magic. You can draw with them? Many artists actually do? The only talk of ink with drawing I’d seen was from my own experiments writing and doodling on journal pages with a dip pen, and a few weeks over the summer when several people were discussing Noodler’s Ink. 

Why not? my inner voice asked. You can save up and get one and see what happens. 

I haven’t bought art supplies for myself in three weeks, darlings. Three glorious, fountain pen filled weeks. And I don’t regret it at all. 

The doodles on these journal pages were done as I sat idly in the morning, curled on myself, letting my mind wander. Each gesture, when I draw or write with my Lamy, is exaggerated. Swirls and swishes and hash-tag lines. Want a thicker line? Press down. Thinner? Less pressure. You don’t need much for the black ink to come out, and it works over anything. Magic. 


If you’ve read my post from today’s newsletter, you know how odd it is, to write that you don’t need a certain supply to make certain art. But I wanted to write this post, in conjunction, to show that when you have saved up, when you’ve waited and researched and gone to finally get that supply, cherish it. I wasn’t holding off on doodling or drawing because I didn’t have the fountain pen, but I sure am awash in joy from holding it, even if I’m writing my day’s to-do list. 

The pen I purchased is a Lamy Safari fountain pen, which costs $35. I also use a converter so I can draw & write with Noodler’s Bulletproof Black Ink.

{experimenting with new materials!}

A BUNCH of new stuff I'm experimenting with!

1. Puffy Paint. I was wandering through Wal-Mart the other day, and saw the little bottles of puffy paint. I thought, "Why not play with these?" as they're only $1 each. Grabbed a black and white and have been doodling around things with 'em since. Near everything I've touched since then has gotten the puffy paint treatment.

2. Gems and Rhinestones. I finished reading the Crafty Chica's first book, Waking Up in the Land of Glitter last week, and had a sudden hankering to grab some gems and glue 'em down. What fun they are!

3. GLITTER. See above. Also, there's this invention called a Glue Pen; holy CRAP do I love this thing! I have the Martha Stewart ballpoint one, and daaaamnn. I'm gathering coupons to get the other tips at Michael's later this week!

4. Fiber Paste. I think I've posted about this before, but I decided to try it out on paper. It's SO COOL. Feels like (and acts like) rough watercolor paper.

What new things have you tried? Once you throw the "rules" out the window, there really are amazing new discoveries out there for your favorite craft products.

{watercolor play day!}

I had a post all lined up to publish yesterday, but when I was out with my friend at Starbucks, I was distracted by writing, and ended up not posting. Side Note: I really wonder what people think when they overhear us; our conversations are all fannish, and usually about the weird stuff we find online. Ah, well! I'll save that post for Monday because I've decided today is Watercolor Play Day.

This proclamation came to me quite suddenly, ie, Kass posted about her watercolors and let me know via Twitter, then encouraged me to get going. And then some other people started talking about watercolors, and I was like, "What the heck? Why not play!"

You see, on my birthday, I decided to go for it and buy myself something I've wanted for awhile but could never justify the cost of -- a compact set of Windsor & Newton watercolors.

The ones I have are for kids, and when you rub your hand over them, they're all chalky and uggg...and I wanted some nice ones to give me great colors, plus be portable enough to throw in my purse and accompany me to a cafe or restaurant (you mean you don't whip out your journal at the table? Some people call it anti-social -- I call it inspiration!).

Anyway, I had a coupon, so the set is mine. I spent that night trying to get a feel for them. I'm so used to acrylics -- fluids, more specifically -- so this is a new experience for me. I just think watercolors look beautiful, and really want to keep going and maybe go a bit bigger. Luckily, the paper I use in my journals has a great tooth that accepts the watercolors nicely, so we're gonna go collage and play.

Also, have a painting to finish. And more ink to spray. I love the weekends! Despite working on creative projects all week, the weekend's when I can simply play without any guidelines or deadlines getting in the way.

{wouldn't it be fun to ... ?}

pg 2 detail

I've felt a metamorphosis of late, not only a shift in the colors I choose, but how I use them. I'm not talking about adding a new mix of colors to an approach already discovered, but using acrylics in a new way. 

Instead of doing washes, or random areas of paint with my hands, or applying fluid acrylics over collaged items, I'm going for blocks of color. There's no real method here, other than the thicker and more opaque the better; I choose a color almost blindly -- without forethought, not sight -- and apply it to the page. 

My journal has become key during the last week or so, a safe haven for me to experiment in, to make a mess, try new things, explore this new way of thinking. And I love that about my journal -- that there's no pressure, no reason other than to play and experiment. To make mistakes. I've gone through phases while working on these pages where I hate what's happening - that it's not going in the direction I want (and why am I bringing that kind of thought into it in the first place?), but I just keep going. 

A lot of it is fueled by this: "Wouldn't it be fun if...?" 

Such as: "Wouldn't it be fun to make shapes and then add white everywhere?" 

journal pages from 10-22


"Wouldn't it be fun to write over stenciled shapes?" 


pg 4 detail


"Wouldn't it be fun to add a bit of orange?" 


pg 5 detail

I can't even begin to tell you how freeing it is to approach art this way - with fun in mind, not the final product. 

journal pages from 10-24

And it goes past art. Such as yesterday's, "Wouldn't it be fun if we went to the dog park?" 

Or maybe, "Wouldn't it be fun to work on the floor?" 

"Wouldn't it be fun to have ice cream for lunch?" 

Try asking yourself questions with this approach, if only once today. Don't censor yourself, or allow your inner Grown-Up to hit the idea down. Just see something and wonder...

Wouldn't it be fun? 

The answer is a resounding 

YES

(Check out more detail photos of these pages here.)

{points of two week #38: monocromatic fun}


Points of Two is an experiment in journaling with myself and Roben Marie! Check out our archives to see the previous weeks' pages.

(week 37 was eaten by time. go here to see those pages.)

This week's theme was monochrome pages -- that is, using only one color & its various shades. I chose red...which made my page pretty pink!

I just did flocking for the first time!

Granted, I had to look it up on the internet to even figure out what it is — it’s those furry appliqués you find on cards and such (technically small bits of fiber applied to a surface, but that’s a boring definition!) — but then I did it myself and wow! It was one of those wide-eyed childlike moments when I pulled back the sheet and saw the result — WOW! That’s cool!

Working with only one color range is HARD! I wanted to bring in other colors so many times but resisted because the last time I worked with one range, I had a breakthrough and knew I might have another. I gathered all my red-range supplies and got working!

Things I’m having tons of fun with:

  • Tinting/Coloring printed papers with inkpads. This is so much fun, and can add character to your printed scrapbooking papers! If the pattern’s awesome but the colors don’t work, tint it!
  • Writing with light Copics. You can totally do this with any markers. See how it almost looks like I used a watermarking pen (that is, the writing is almost the same shade of the paper, maybe a bit darker)? That’s just a Copic that matches the page’s background. I’m in love with writing and then writing over the stuff to give it a more graffiti/messy look. I have a little tutorial (done in this style!) for how to do it. Markers are AWESOME!
  • EYELETS! I’ve had these for years and never used them! Now, I’m having fun attaching papers with them. Also, stitching papers with the sewing machine FOR THE WIN!
  • Stamps! This is all Ky’s fault. But I’m now using my stamps more on journal pages.


I’m just making a big ol’ mess, mixing mediums all over the page!

But this one has a deeper meaning, too! What happens when we enter a creative winter? That is, when we have less ideas or time or need to pull back — how do we get through this period with some of our sanity intact?

Mine isn’t a drought of ideas, rather, I’m losing the studio in a little over a week. Yes, I’ll have everything set up in my bedroom out in Arizona, but that’s different...this room has been devoted to my art, and has a certain feeling. I spend more time in here than anywhere else in my house (unless you count the hours asleep in my room, but even then, I don’t think I’m in there more than the studio). So how do I get through this period of time when we’re looking for an apartment and I’ll have limited access to supplies? How do I keep the fire burning?

I think part of the answer is to remember a fire sometimes burns down to embers, but is still producing heat. The passion remains. We just need to have faith that we can add kindling whenever we’re ready for those large, dancing flames.

And the lovely Roben-Marie's page, done with my favorite color (though not on purpose *g*)! Be sure to check out her blog for the story behind her page.